OL 345 Assignment Two Homework
Online Learning: OL 345 Community Based DRR Training.
Center for Sustainable Development. https://csd-i.org/disaster-risk-reduction-online-drr-training/
This week’s resources:
-Assignment Two Discussion
-Magee Example Project Assignment Two
-CARE: Climate Vulnerability and Capacity Analysis Handbook: https://www.care.org/sites/default/files/documents/CC-2009-CARE_CVCAHandbook.pdf
-Lesson Plan: Participatory Capacity and Vulnerability Assessment
-How to Card: Participatory Capacity and Vulnerability Assessment
Assignment Two. Defining Community Disaster Risks, Vulnerabilities, Hazards and Capacities for one of Your Activities
1. If you need to hold a fresh, brand-new participatory capacity and vulnerability assessment please proceed to Part One, then Part Two, then Part Three.
2. If you can gather the specific information that you need from the notes of your first assessment—or from a meeting with a few of your committee members— please move directly to Part Three of this assignment.
3. Please note, if you’re holding a workshop or a meeting, there will be a couple of questions that you will need to discuss in order to have full information for Part Three —so make sure you take a look at that.
Course participants who have not conducted a participatory workshop to assess DRR risks, vulnerabilities, hazards and adaptation capacity.
We’re not trying to expand upon your activities list in this course. We’re simply trying to focus our attention on the DRR component of your project and further clarify the most highly critical challenges the community is facing.
Part One.
The first thing to do for your workshop is to make sure that you are well-prepared. That you have people to meet with, you have a place to hold a workshop, and you have the materials that you will need.
If you’ve decided to offer snacks or a nutritious luncheon, you have chosen recipes and have a plan for purchasing the food and putting someone in charge of preparing it so that you aren’t distracted from facilitating the workshop. You also have cups or glasses, tea and water, plates and cutlery, napkins, and a way to clean up at the end.
If you arranged the workshop for Saturday, then you still have a week to fine tune the details.
Part Two.
Hopefully you brought colleagues to help you facilitate the workshop—especially if you break it into groups (of men and of women, or of teenagers and of parents).
The lesson plan that you adapted from ‘CARE: Climate Vulnerability and Capacity Analysis Handbook’ for leading the workshop will be very helpful in both the preparation in advance (because it suggests materials that you will need) but it also tells you what to do at each stage of the exercises so that you can stay on track.
One thing that the handbook doesn’t mention, is that it would be good to begin the morning with an icebreaker (sing a song or play a game) and introductions around the room. We want to make sure that everyone is comfortable being there, that they feel safe enough to say what’s on their mind, and that there is a certain amount of enthusiasm in the room in order to encourage participation.
Take notes throughout the day right onto the lesson plan to remind you about things that went well, things that didn’t go well, and how long the different segments took. For example, you might find that the workshop only took four hours to do rather than eight hours you estimated.
The information on the charts prepared during the 4 exercises will create a good baseline of where the community is no—that you can use for a comparison when the project finishes in 2 years.
Don’t forget that in this exercise we are looking for very specific information about one or two DRR challenges: a detailed definition of both a challenge and a solution, and a list of community capabilities and resources. So at the end of each exercise take a few minutes to focus on the DRR challenges in order to gain clear, simple understanding of the challenge.
Toward the end of the workshop summarize the challenges, and brainstorm with the community about specific causes. Propose one or two potential solution oriented activities and ask if they have resources that could be in support of those. This is explained in greater detail below, in Part Three.
I know that you will be tired at the end of the day but I would take a few minutes when you get home to go through the lesson plan and make a few more notes. The next time you give this workshop or when one of your colleagues wants to give this workshop you can clean up the lesson plan to reflect what really happened. Even a year from now your notes will be very useful.
I would also recommend meeting with your team the next day to get their perceptions of how the workshop went and if any improvements could be made the next time that you give it.
Be sure to take photographs. You should get your volunteer helpers to take photographs of you as well. Be sure to take:
- some close-up detailed shots of some of the participants,
- close-up detailed shots of the materials that you use
- interesting drawings that you might have done in your large sheets of paper
- take shots of the whole group
- take careful shots of the charts on the large pieces of paper that are the results of the 5 exercises — like the map, and the calendar
- photos of you in action—both in front of the group and close-ups of you with individuals
I would suggest that you read our newsletter on taking photographs:
https://nonprofit.csd-i.org/field-guide-capturing-compelling-photos-from-the-field/
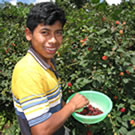
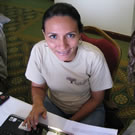
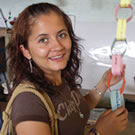
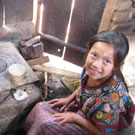
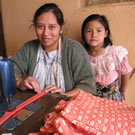
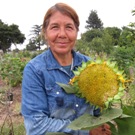
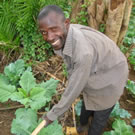
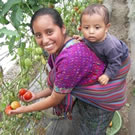
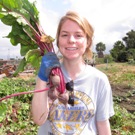
One of the biggest challenges that I see with nonprofits is a shortage of good quality photographs. Get close-ups of people so that they fill the frame of the photograph. Make sure they’re smiling and looking at you. Make sure the lighting is good and that the photograph is in focus. If you’re taking photographs outside where there’s lots of glare, use your flash – it will balance out the glare. If you are taking photographs indoors, turn off the flash. Modern digital cameras don’t need a flash indoors in the flash creates a very harsh photograph. Try an experiment with taking a photo indoors with a flash and then without a flash. The photo without the flash will be much softer and warmer.
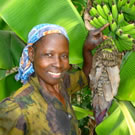
Look at the photograph of the woman with the green banana plant to see what I mean. Take close-up pictures of people doing things – action shots. Take pictures of people doing the exercises in the workshop — such as drawing the map of the community or filling in the calendar — get right in there up close to take the photograph.
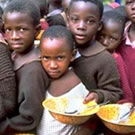
Don’t take too many long distance shots because it’s difficult to understand what they’re about. Don’t take pictures of the back of people looking at something — take pictures of the front of people looking at something. When you’re composing your photograph make sure that there are not a lot of busy things happening in the background to distract from your subject. Please consider reading through the newsletter. If we decide to feature your project in one of our newsletters — one of the criteria in our decision-making process about who we feature is in the quality of the photographs they send us.
Here are some examples:
 |
 |
 |
 |
 |
 |
 |
 |
 |
 |
 |
 |
Take photographs of the charts that you develop in the exercises.
Good luck at the workshop and enjoy yourself!
Part Three.
1. In this assignment, within these challenges, we are looking for the very specific descriptions of the challenges that we are trying to solve.
For example, on the 345 download document page “Examples of information from the initial community PCVA assessment”, Where It Says “Flooding” what we are really looking for in this assignment is this more specific type of definition:
The community is located adjacent to a seasonal river which is frequently dry and sandy during the dry season, but which fills with water during the rainy season. Because of deforestation of the watershed behind the village, when it rains, water runs downhill without soaking into the hillsides and over-taxes the riverbed’s carrying capacity—causing flooding of adjacent farm fields and homes. Gullies have formed on the hillsides which direct rainwater more quickly and directly to the streambed thereby bringing floods to the community more quickly and unannounced.
This is the level of description that are looking for in these first two assignments. Again, let me stress that we’re not looking to expand your project or necessarily change your activities—were just looking for greater specificity in the description of the challenge as demonstrated by the example above.
2. Having defined in specific detail one of the challenges that your community faces—scan the course syllabus (http:// www.csd-i.org/ol-345-community-based-drr/) and OL 345 Community Based DRR Special Course Links — and see if any of the techniques mentioned there might be a possibility for a solution for your challenge.
3. Now, having picked a possible technique, imagine what sorts of materials, resources and capabilities might be needed for implementing that technique. Then, ask the farmers what they might be able to provide in terms of resources and capability to help launch the implementation of the activity. These could include:
-specific skill sets (capacity)
-land
-building materials
-tools
-labor
-trees for planting in the watershed
4. Determine if you have already formed a DRR subcommittee or if one already exists.
5. Determine if you have contact with an expert who can help you fine tune your technique to best fit the community’s context.
The homework to turn in will be:
1. If you held a workshop, a short one paragraph summary of how the workshop went and how it was received by the community members.
2. A few photographs of the workshop.
3. A photograph of a couple of the finished charts
4. If you held a committee meeting as an information gathering tool, a short, one paragraph summary of how the meeting went.
All course participants:
5. A very concise and specific definition of one, or if you would like, two of your DRR challenges.
6. Specific techniques that could potentially work as solutions for your challenge.
7. A short, bulleted list of resources and capabilities that your community may have available for supporting a solution to your DRR challenge.
8. Let me know if you have already facilitated the development of a DRR committee with your community. If not, consider doing so over the next four weeks.
9. Let me know if you have contact with a DRR expert who can help you to evaluate the challenges, resources and potential solutions. If you don’t, begin the process of establishing a relationship with an expert over the next four weeks
Go to Magee’s Example Project Assignment Two to see what this could look like.
See you next week.